Wedding Wednesday - DIY Vintage Book Table Numbers

Wednesday, September 26, 2012


Many aspects of our wedding were DIY, but one of my favorite projects was our table numbers. We wanted a vintage, slightly rustic look for our tables but we didn't want to lose the element of class and elegance. We are both avid readers, so I loved the idea of using vintage books as a part of the table numbers. 

DIY Vintage Book Table Numbers:
Hardcover books - 1 per table
Rustic looking fabric such as burlap or a rough linen
Twine
Large stamp with whatever design fits the look & ink
Painter's Tape
Unfinished wooden numbers (mine were 4"tall and 1/2" thick bought from sjawood on ebay)
Spray paint (I used metallic silver)
Hot glue gun and glue sticks 


Start with a hard cover book, at least an inch or two thick. Cut the fabric to fit around the front and back of the book with an inch excess (like you did with book covers back in elementary school). Secure the fabric on the insides of the book - we used painter's tape to save the inside covers.


We then used a large stamp which we bought at Michaels, covered in a black ink. The fabric took the ink differently on each book, which gave a fun eclectic look. 


After stamping the books, we added a pink ribbon as a bookmark, and used twine to wrap the book shut.


I bought the wood from sjawood on ebay. They offer many styles and sizes of unfinished wood numbers, these were 4" tall wooden MDF numbers in the Arial font. I then spray painted the numbers silver. 


Once the numbers were dry, I hot glued them directly to the books. For double digit numbers I first glued the two pieces together before adhering them to the book. Let the hot glue fully dry before attempting to move the books anywhere, lest the numbers fall over. 


And that's it! Simple table numbers for a rustic, vintage feel. We mixed the rustic feel of burlap squares and blue vintage ball jars with silver mercury glass and strings of beads for that hint of elegance. Mixed white and blush flowers completed our look and I think pulled it all together quite nicely! 

***The first and final photo are from our photographer, Kelly Sweet. All other photos were taken by me (some on my older iphone, so I apologize for the difference in photo quality). 

Monday Miscellany

Monday, September 24, 2012

This weekend was one of those fantastic weekends where we had no plans and just relaxed. I wish I had another day of that, but instead it's back to work. Here are some pretties to make the work week a little more bearable. 


{1, 2, 3, 4, 5, 6}

Crazy for Capes

Monday, September 17, 2012


{1, 2, 3, 4}

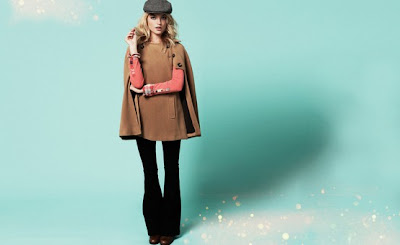
I'm absolutely in love with capes this fall. I've been obsessed ever since I saw my sister in law wear one last year. They have a dainty ladylike air about them and are so wonderfully vintage. I love how they seem to add a bit of mystery to the wearer. But mostly, I just love any excuse to legitimately wear a cape and pretend I'm back in Victorian England hurrying off to a winter ball with my fur muff and new evening gown. Or you know, something like that.

I think this might be a fairly simple project to undertake, so I've gathered materials to make my own. I haven't sewn in a while, so we'll see how this goes!

DIY Stemware Rack

Monday, September 10, 2012


This little DIY wine glass shelf came from a complete lack of storage space in the kitchen and our crazy collection of glasses. I wanted a fun way to display our stemware, and what's better than a stemware shelf? The few wine glass racks I could find that were also shelves were super expensive, so I decided to make one myself.  It was fairly easy to make, although it did get me locked out of the house for 2 hours one night. So watch out for that, these things are tricky little buggers.

Materials:
Stemware rack from Crate and Barrel
Thin sheet of wood (Home Depot will cut it to size for free!)
Paint - Glidden in "Softest Juniper"
8" decorative wall brackets from Menards
4 screws


I started with this unfinished stemware rack from Crate and Barrel and the thinnest piece of wood that I could find at Home Depot. I think it's actually meant to be a bottom of a drawer. Home Depot will cut the wood for free, so I had them cut it to the exact measurements of the shelf. 


I then painted it Glidden's "Softest Juniper" which is a great minty green. Both pieces of the wood were unfinished, so I applied 2 coats and sanded the edges just a bit to give it a worn look. 


Once everything was dry, I used wood glue to attach the top of the shelf to the rack. (This was where I got locked out. It was a long day.) 


Once the glue had dried, Kacey and I measured and marked where the brackets would screw into the shelf. Note - make sure the screws are long enough to go into the wood, but not stick out the other side since it will impede the bottom of the glasses from sliding into the racks. 


And that was it! Then we just flipped it over and attached it to the wall. 


I love how this shelf now displays both our stemware as well as our stemless glasses and Kacey's beer mugs. And it's also a fun decoration in our new place!

Current Craves - Back to Shoe Basics

Friday, September 7, 2012


Now that it's September I can feel ok about craving boots again. This month I'm liking the basics - stylish pairs that will get you through the season and beyond.

1.  Aldo Ernestina Flats - perfect for everyday, with a ladylike pointed toe
2.  Michael Kors Sadie Open Toe Pumps - classic, sophisticated, and very Kate Middleton!
3. Vince Camuto Elvin Booties - a fun twist on a basic black bootie
4. Frye Paige Tall Riding Boots - I dream of someday owning a pair of Fryes. These would be lovely
5.  Diba Reb Western Boots - and of course the western boot! I think these are fantastically rugged yet classy

Wedding Wednesday - My Wedding Part 2

Wednesday, September 5, 2012

Proof that a little rain doesn't wreck a wedding day! 

Time for part 2! And man, was it hard to choose photos, when all I want to do is share them all. After the ceremony we headed to downtown Milwaukee where our reception was being held at Cuvee, a champagne lounge in the Third Ward. We took group photos in the area and then started celebrating the night away!

My lovely ladies

The dashing gents


One thing Kacey insisted on was pine cones in his boutonniere. I want to thank Deb at The Flower Lady for somehow incorporating them into a June wedding and not making it look too Christmasy. They looked fantastic and the guys loved them. 


Cuvee is in this old cream city brick building with exposed ceilings and pillars, so I wanted to go with a rustic, vintage look to fit in with the design of the building. We didn't use a wedding planner or designer - everything was planned and made by my mom, mother in law, aunts, friends, and myself. 

I collected blue mason jars for about a year from various antique shops and flea markets and I love how they added a pop of color to the table. We went with a light palette of creams, blush, and peach for the flowers and wanted a loose, natural, garden feel for the tables. I made the table numbers (DIY to come!) and found mercury glass candle holders for a bit of shine on the tables. I ended up designing the menu cards on Illustrator to tie in with the vintage theme of the invitations. 


I'll be honest, the dessert table was probably one of my favorite things :-) That was one detail that I knew I wanted from the beginning. Simma's bakery did an amazing job on the cake and all the mini desserts, and I think it was the hit of the party! I was so busy talking and dancing that night that I didn't even get a chance to try anything - but luckily we took the extras home and froze them so I can eat the left over pastries whenever I want to remember the wedding! 


One last fun detail - the beaded butterfly on my bouquet was given to me by my grandma. It was part of her mother's wedding dress from 1918 that she kept all these years! I really wanted to find a way to use it in my wedding, I loved that it was a part of my history and it fit perfectly into the look of the wedding. I kept it a surprise, and right before I walked down the aisle I showed my grandma the bouquet with the butterfly attached. She was so excited that she ended up crying! I was so happy that I was able to use so many personal items from my mom and grandmas for the wedding. 


So that's my wedding! There are about a thousand other photos I wish I could share, but you've probably had enough. The entire day just flew past and was absolutely amazing. I wish I could go back and relive it all again, but so far married life has been just as great! 

Fashion's Night Out - Cont.

Tuesday, September 4, 2012


To follow up on my last post, I also wanted to share that the Historic Third Ward will also be throwing a bash for Fashion's Night out. You can find out more at their facebook page. And Rebekah let me know that Bayshore Mall will also be hosting events. So if you're in the Milwaukee area at all, check one of them out!


Fashion's Night Out - Milwaukee

Tuesday, September 4, 2012


It looks like Milwaukee is finally getting in on Fashion's Night Out! Mequon is hosting a Fashion Scavenger Hunt on Thursday, Sept 6, followed by a party with a drawing to win tickets to NYFW. You can visit their facebook page for more information and the participating retailers.

 I'll be there, any Wisconsin bloggers or non bloggers want to meet up?  Let me know. Hope to see you there!
Proudly designed by | mlekoshiPlayground |