Showing posts with label apartment. Show all posts

DIY Rustic Wooden Fence Board Headboard

Monday, February 17, 2014


I fell in love with all those reclaimed wood projects on Pinterest -especially the headboards. However, having moved from the land of barns to the land of cacti I no longer have access to any perfectly weathered gray barn boards to make fun projects. So instead, I decided to make our headboard a little more tailored looking, but still retain the rustic feel that you get from the reclaimed wood. Enter the cedar fence slats. They're light, the perfect thickness, and easily cut down to size by your handy Home Depot or Lowe's worker (or yourself if you can work a saw. We don't have one, hence the help from employees). 

Materials for a queen size bed:
6 cedar fence slats from Home Depot - have them cut to 63" long
2 two by fours for the legs - have them cut to 48" long
1 one by four cut to 32 inches for the center brace (or 1 inch shorter than the total height of the boards)
nails
wood glue 
Minwax Water Based Pre Stain Wood Conditioner
Minwax Water Based Stain in Toffee
Ploycrylic Protective Finish
Rags for wiping stain on and off
Paint/foam brushes


 Start with the boards cut to the size you need. For a queen size bed, the length of my boards was 63 inches. We sanded them all down to remove any splinters. This can either take a few hours if you have an electric hand sander, or a few weeks if your husband won't let you buy one and promises to sand them all himself and then keeps forgetting. Ahem. Three weeks later I took a hammer to some of boards to give them that beaten, weathered look that you just don't get from new cuts of lumber.

Note - the boards I used are cedar fence slats. Cedar smells. I happen to love that smell but if you don't, you might want to think about using a different type of wood. It's been in our house for 6 months now and every time you enter the room you can still detect a faint woodsy cedar scent. Like I said, I love it because it makes me think of forests and the outdoors. But it doesn't go away quickly, so make sure you're ok with that!


I used a water based stain for this project since I have a fear of mineral spirits and don't want to use it to clean up regular wood stain. Minwax has a water based stain that comes as a clear tint and you add the color like you would a regular can of paint. I think it worked great and I had no trouble using it. I used the Pre-Stain Wood conditioner on the wood first to give it an even finish. I didn't use this on the headboard legs since they wouldn't be seen, and you can definitely tell the difference between the boards where I used the pre-stain and where I didn't. The boards had a much cleaner and even coloration when I used the conditioner first. 


I used 2 coats front and back of the "Toffee" color. After everything dried I finished it with a topcoat of Ploycrylic to protect and seal everything. Stain the slats and the 2 boards for the legs. I also stained the center brace because why not? This was my first time staining anything and I just followed the instructions on the cans. It worked beautifully.


Once everything dries it's time to assemble. Lay the boards out how you want them to go. Mine didn't line up perfectly, but I liked the warping and thought it added character. If you want yours to lay perfectly, check how the boards fit at the store before you buy them. 

Once everything is lined up, flip each of the boards over so the back of the headboard is facing up. Run a line of wood glue along the center brace and place perpendicular to the slats in the center of the board. Stack something heavy on top to weigh it down until the glue dries. See the photo below? The brace is under the middle bag of charcoal. My husband we have a lot of charcoal. Also, random dumbbells. 


Here's where it gets tricky. I wanted to nail the boards to the legs from the front so I could line up the nail heads. To do that, before I flipped the board back over, I lined up the legs and marked with chalk where I wanted the lowest board to land and made sure everything was level. Then I turned the whole thing over and slid the legs underneath, lining up the lowest board with the chalk marks. 

Note - I measured my bed frame and figured out exactly how far apart the holes were to screw in a headboard. If you don't want to screw the board directly to your frame, it's less important where the legs of the headboard go. 


Once I had the boards lined up, I nailed each of them to both the legs and the center brace. Then all that's left to do is screw it into your bed frame or attach it to the wall!

I absolutely love how it turned out, and I think I'm going to do it all over again to make a headboard for our new bed. It'll probably only take me another year or so.


DIY Stemware Rack

Monday, September 10, 2012


This little DIY wine glass shelf came from a complete lack of storage space in the kitchen and our crazy collection of glasses. I wanted a fun way to display our stemware, and what's better than a stemware shelf? The few wine glass racks I could find that were also shelves were super expensive, so I decided to make one myself.  It was fairly easy to make, although it did get me locked out of the house for 2 hours one night. So watch out for that, these things are tricky little buggers.
Materials:
Stemware rack from Crate and Barrel
Thin sheet of wood (Home Depot will cut it to size for free!)
Paint - Glidden in "Softest Juniper"
8" decorative wall brackets from Menards
4 screws


I started with this unfinished stemware rack from Crate and Barrel and the thinnest piece of wood that I could find at Home Depot. I think it's actually meant to be a bottom of a drawer. Home Depot will cut the wood for free, so I had them cut it to the exact measurements of the shelf. 


I then painted it Glidden's "Softest Juniper" which is a great minty green. Both pieces of the wood were unfinished, so I applied 2 coats and sanded the edges just a bit to give it a worn look. 


Once everything was dry, I used wood glue to attach the top of the shelf to the rack. (This was where I got locked out. It was a long day.) 


Once the glue had dried, Kacey and I measured and marked where the brackets would screw into the shelf. Note - make sure the screws are long enough to go into the wood, but not stick out the other side since it will impede the bottom of the glasses from sliding into the racks. 


And that was it! Then we just flipped it over and attached it to the wall. 


I love how this shelf now displays both our stemware as well as our stemless glasses and Kacey's beer mugs. And it's also a fun decoration in our new place!

Aquamarine

Tuesday, July 10, 2012


{1, 2, 3, 4}

I've mentioned this before, but I just love aquas of all shades. I'm trying to find an old console or table to paint minty aqua and turn it into a tv stand for our new place. I did some major cleaning today and I'm quite proud of myself. We can actually walk through the living room without banging into boxes, hurrah! Wine and chocolate to celebrate! That's what people do when they accomplish major cleaning, right? Can we make that a thing? I think that needs to be a thing.

Wedding Wednesday - Mixing Styles

Wednesday, April 11, 2012

Let's talk about mixing decorating styles. Kacey and I got the townhouse we applied for! We don't currently live together, I know it's pretty rare these days but what can I say - we're old school. I absolutely can't wait to move out of an apartment (and away from my stupid downstairs neighbors) and into our new place, but we have a slight problem. See my decorating style is like this:


And Kacey's style is this:


So, uh what do we do? I don't fancy living in a log cabin (unless it was an actual cabin up north in the woods, but our town house is in the middle of a suburb) and Kacey doesn't want to live in a world of pastels. So for those of you who live with husbands/boyfriends/fiances how do you balance masculine and feminine decorating styles? I don't mind having rustic bones of a room, as long as all the cushions/blankets/textiles are pretty and fluffy and cozy. I've been looking at Scandinavian interiors, I feel like they have a nice minimalistic masculine vibe with some quirky and feminine touches without being overly girly. Any advice on how to make sure we don't end up in either a bachelor pad or a pretty pretty princess palace? 


Minor Monday Miscellany

Monday, April 2, 2012


Alright, I'm finally back and mostly healthy now although I still have a bit of a cough. This weekend was very enjoyable and included going out for Saturday morning brunch with some good friends who I hadn't seen in awhile, lots of wedding planning, and spending some much needed time with Kacey since he's been traveling lately. We also found out we got the town house and our lease starts in May! I'm so excited, we're about a 2 minute drive from a lake which will be amazing in summer, have 2 stories all to ourselves plus a basement, a big beautiful kitchen (not quite as cool as the one pictured above), and central air which was a huge factor for us. I've been constantly thinking about decorating and DIY ideas for our new place and don't know if I can wait until June to move in!

Keeping Cozy

Wednesday, December 28, 2011


Although we've been lacking in the snow department, it's still been pretty chilly here in Wisconsin. I've found myself drawn to big cable knits and cozy sweaters to keep warm. These photos just make me want to curl up under a blanket with a great book in front of a roaring fire.

Anthropologie Cirrus Duvet DIY Tutorial

Wednesday, November 30, 2011

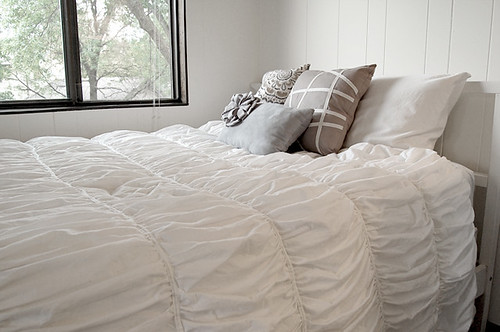
I have an early Christmas present for you, I finally finished writing the tutorial for the Anthropologie Cirrus DIY duvet cover that I made this summer. Yay! So without further ado, here is my tutorial for the duvet cover:

Anthropologie Cirrus Bedding

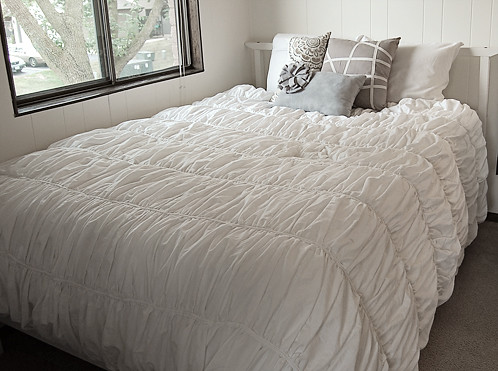
My version

This tutorial is made to fit a full/queen sized comforter measuring 88 x 88 inches. Measure your comforter and adjust measurements to fit.

Materials:
2 king size flat sheets
1 queen size flat sheet (for reverse side of duvet)
matching thread
sewing machine
double needle – optional
some sort of closure, I used 3 yards of lace to create ties but buttons or snaps can be used

Sheets at Target about $15-$20 each depending on size

 Part 1: The Front Panel
-       First measure the duvet that will fit inside the cover to determine the size. Double the width (or more if you want a ton of gathers) and add an inch to both length and width to allow for seam allowance. My comforter was 88 x 88” so the measurements were 89” length by 177” width
-       Wash and iron/steam the sheets to prepare them

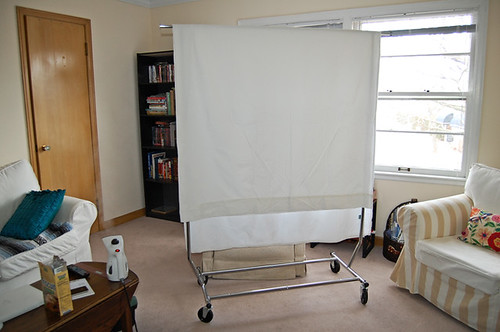
I found the easiest way to get the wrinkles out is to hang the sheets up and steam them. 

-       Sew the 2 king size sheets together lengthwise
-       Press the seam and spread out the sheets on a very large surface (like the floor) wrong side facing up
-       Cut out the measurement that you took for the comforter so you have a piece of material 89 x 177” with the seam running the long way down the center. Save the extra fabric for use later!
-       Divide the panel into 8 section horizontally, about 11” apart. It’s easier to pick a round number and have a little extra/less on the ends than trying to measure something like 11.362 inches between each section. Save yourself some headaches, you won’t be able to tell when it’s finished anyway
-       Draw the lines on the wrong side of the fabric marking where the gathers will go

Mark on wrong side with pencil

-       Sew down the lines with a basting stitch, leaving a few inches of thread hanging on each side
-       Also baste along the top and bottom of the sheet with a ¼” seam allowance
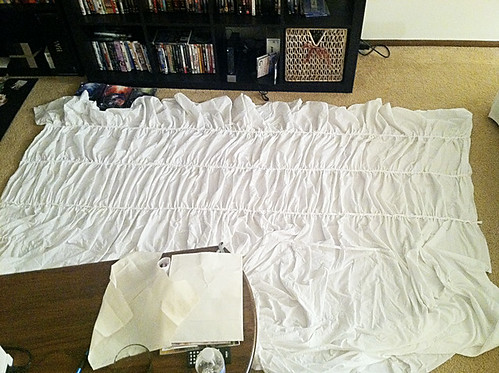
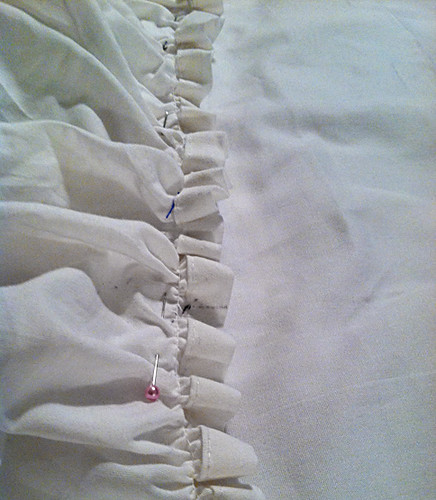
-       Gently pull one of the threads to gather the sheet to the proper width. (Mine was 89 inches, remember to include room for the seam allowance)

Pin down the strips over the gathered seams
Part 2: The Strips
-       If you get bored sewing straight lines and gathering, you can start making the strips that will be sewn on top of the gathers to hold them in place. These will run the width of the comforter so use the width measurement again
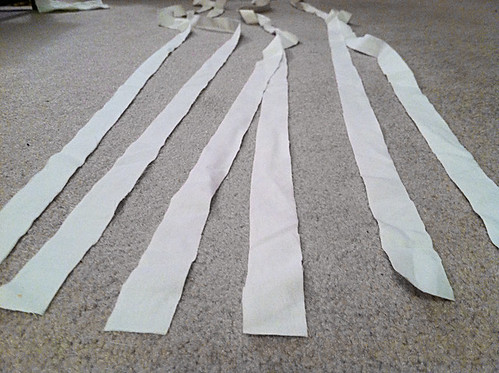
-       Cut 7 strips 1” wide by 89” long (or whatever the width of your duvet will be)


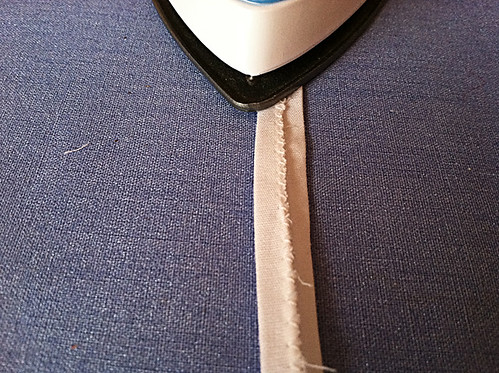
-       Fold each strip in half lengthwise and sew together. I found using a zig zag stitch about ¼” from the edge was most effective and least stressful


-       Press the strips so the seam is in the center


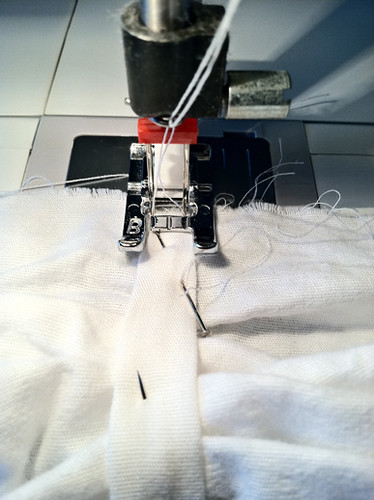
-       Flip the strips over so the seam is facing down and lay on top of the gathered rows, but not the top or the bottom. Pin in place


-       Sew the strips down. I found the best way to do this was to buy a double needle attachment for my sewing machine so I only had to do one pass, but if you don’t have one you can sew a narrow seam on one edge of the strip, and then go back and sew a narrow seam on the other edge


Part 3: The Back Panel
-       Cut the remaining  sheet to the proper length of the comforter (again, mine was 89 x 89” including seam allowance
-       Take the extra fabric from the first two sheets. There should be enough left over to make a top panel. I made the top panel 1½ feet long by 89” wide
-       Sew a 3” hem on one end. This will overlap the bottom panel and be tied together to hold the duvet inside
-       Lay the front panel right side up on the ground. Decide which end will be the top and lay the top panel wrong side up on top of it with the sides matching. Lay the bottom part of the back panel even with the bottom and sides of the front panel, wrong side up. Pin ½” from the edge all the way around the duvet cover to hold everything together


-       Sew around entire cover

Part 4: Closures
-       Decide how you want to have the cover close. I decided to do 5 lace ties
-       I measured 14” between each tie and pinned a 6” strip of lace to the back sides of the back top and bottom panels
-       Sew down the ties (or if you’re really ambitions, create button holes and attach buttons)
-       Flip inside out and stuff your duvet inside. Tie the lace into pretty bows

And you're done! 


I hope that was clear enough to help, please feel free to ask any questions you might have while making it!


Linking up with East Coast Creative 
Proudly designed by | mlekoshiPlayground |